Like all things your bike needs regular maintenance just like a car. While this may seem like
a task left to professionals, its really not a big deal. So, without further delay.
Here is how to perform a basic tune-up on your sport bike.
 |
| Todays Tech Tips Are Being Performed On An R6, other bike may vary slightly, but the overall effort and general locations of spark plugs and air filter will remain the same. |
 |
| Next remove the upper air duct covers. These being off will make later steps a lot simpler. Again they are just held on by to small screws and easily lift off. |
 |
| This is what you'll see under the tank. It may vary slightly depending on the make of the bike, but air box should be the majority of the undercarriage at this point. |
Loosen the two screws on either side of the ram air tubes and remove
 |
| With tubes out, remove the bolt securing the air box in place and lift up to gain access to the breather lines connecting to it. |
 |
| There are 4 air lines and one sensor to remove. One in the back, a couple on each side and the air temp sensor just pulls out gently. if it doesn't free check to make sure it doesn't screw in. |
 |
| This is what you should have below the air box. |
This is the coil, once removed check for any damage or corrosion in the plug end that may suggest the need for replacement. Better to do it now if needed then later, since you have it apart.
 |
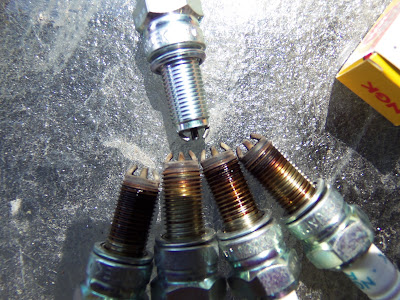
| These plugs have about 8-9000 miles on them. As you can see the electrode is misshapen and worn. but we have good coloration which means the tune is correct and proper air/fuel mix is in each chamber. |


